Showing posts with label Vegetarian. Show all posts

Sunday, 9 June 2013

DOUBLE CHOCOLATE CHIP COOKIES!!!

Every so often you just need cookies, and what better than double chocolate chip ones!

Makes: 18...apperently, I got 13 out of the mixture
Cooking time: 10 minutes
Cooking temp: 180 degrees C/Gas Mark 4
Keeps for: about 5 days in a air tight box
Average cost: 

Ingredients:
  • 100 grams of margarine
  • 75 grams of light brown sugar
  • 2 tablespoons of syrup
  • 150 grams of self raising flour (use gluten free flour if you need to!)
  • 20 grams of coco powder 
  • 100 grams of chocolate chips (can me normal milk or white or both!)
  • 2 tablespoons of milk

If you just want to make plan cookies with out the coco but still with chocolate chips you just need to put in  170 grams of self raisin flour and miss out the coco powder.


What you need:
  • 2 baking trays
  • 1 mixing bowl
  • Tablespoon
  • Wooden mixing spoon
  • Spoon


How to make it:
  1. Put the oven on at the correct temp.
  2. Grease two baking trays with margarine. Just get a tissue or some grease proof paper, scoop up a bit of marg with it and then rub it all over the baking tray.
  3. Put the marg and sugar into the mixing bowl and beat until smooth and fluffy. And make sure you get all those lumps out of the sugar!
    LUMPY SUGAR! squish the lumps before putting in the bowl
  4. Add the syrup, flour, chocolate chips, and milk into the bowl and mix well together. It will be a thick sticky mixture so don't worry if you think its going wrong! (cos it isn't :D)

  5. Now place spoonfuls of the mixture onto the baking trays, make sure they are small!! I made mine too big and only got 13 out of the mix, and they took longer to cook! 
  6. Once all the mixture is on the tray, put in the oven and leave to cook for 8 to 10 minutes. 
  7. When they have cooked remove from the tray onto a plate to cool.
    also I burnt some :(
  8. ENJOY!!

    although these look not fully cooked they are!! so keep an eye on your cookies! (also they  look a bit like dog poop )


Uni Yums ♥

Pasta and Beans!

Okay so here is a great vegetarian dish I tried the other day and I loved it!!

Serves: 1 person
Cooking time: 10-20 minutes
Cooking temp:  hob on high to medium heat
Keeps for: 3 days in the fridge
Average cost: 
Calories: 348

Ingredients:
  • 50 grams of pasta (use gluten free is you need it!)
  • 1/2 teaspoon of olive oil 
  • 1 garlic clove
  • 60 grams of asparagus
  • 30 grams of green beans 
  • 50 grams of sugar snap peas or board beans or both!
  • 50 grams of peas
  • Zest and juice of half a lemon
  • 1 teaspoon of extra virgin olive oil (could just use normal olive oil)
  • Parmesan cheese


What you need:
  • 2 Sauce pans
  • Colander
  • Chopping board
  • Cutting knife
  • Spoon or ladle 
  • Small bowl
  • Zester (like a really fine cheese grater)
  • Teaspoon
  • Weighing scales
  • Cheese grater


How to make it:
  1. Cook pasta in the sauce pan of boiling water according to the packet instructions.
  2. Put a the frying pan on the hob, and add one teaspoon of oil. 
  3. Peel and chop up the garlic and put in the sauce pan. 
  4. Cut the asparagus in halves and shell and skin the board beans, the sugar snaps go in the pan as they are, same with the peas (can be frozen). 
  5. Add the veg and stir to mix everything together. 
  6. Add into the pan containing the veg, a ladlefull/ 3 tablespoons of water from the pasta pan.
  7. Put a lid on the pan and leave to cook for about 5 to 7 minutes. 
  8. Peel the lemon vest and squeeze the juice out into a small bowl. 
  9. Drain the pasta, and put in your bowl (the one you will eat out of).
  10. Drain the veg and put back in the pan. Add the lemon juice and zest to the veg, also add the extra virgin olive oil (or just normal olive oil). Stir to mix.

  11. Add the veg to the pasta and add the parmesan.
  12. DONE! now ENJOY!
Uni Yums ♥

Friday, 7 June 2013

Porridge!!!

I just made this lovely filling breakfast :)
This is great for a quick breakfast, and can be put in the fridge for up to 3 days. So if you know you are going to be busy the next few mornings make a double or triple batch, put in the fridge and microwave the next morning! (you might need to add a bit of milk or water to thin down)

Serves: 1 person
Cooking time: 10 minutes
Cooking temp: Medium heat
Keeps for: 3 days in the fridge.
Average cost:
Calories: around 150 (more if you use milk)

Ingredients:
  • 20 grams of rolled porridge oats
  • 100 grams of milk or water
  • Mixed seeds-something like, pumpkin, sunflower, sesame, and poppy seeds. (optional)
  • Sultanas (optional)
  • Yoghurt (optional)
  • Pinch of cinnamon (optional)
  • sugar/syrup (optional-put on after its been cooked, I have to have some form of sugar in porridge!)


What you need:
  • Sauce pan.
  • Spoon


How to make it:
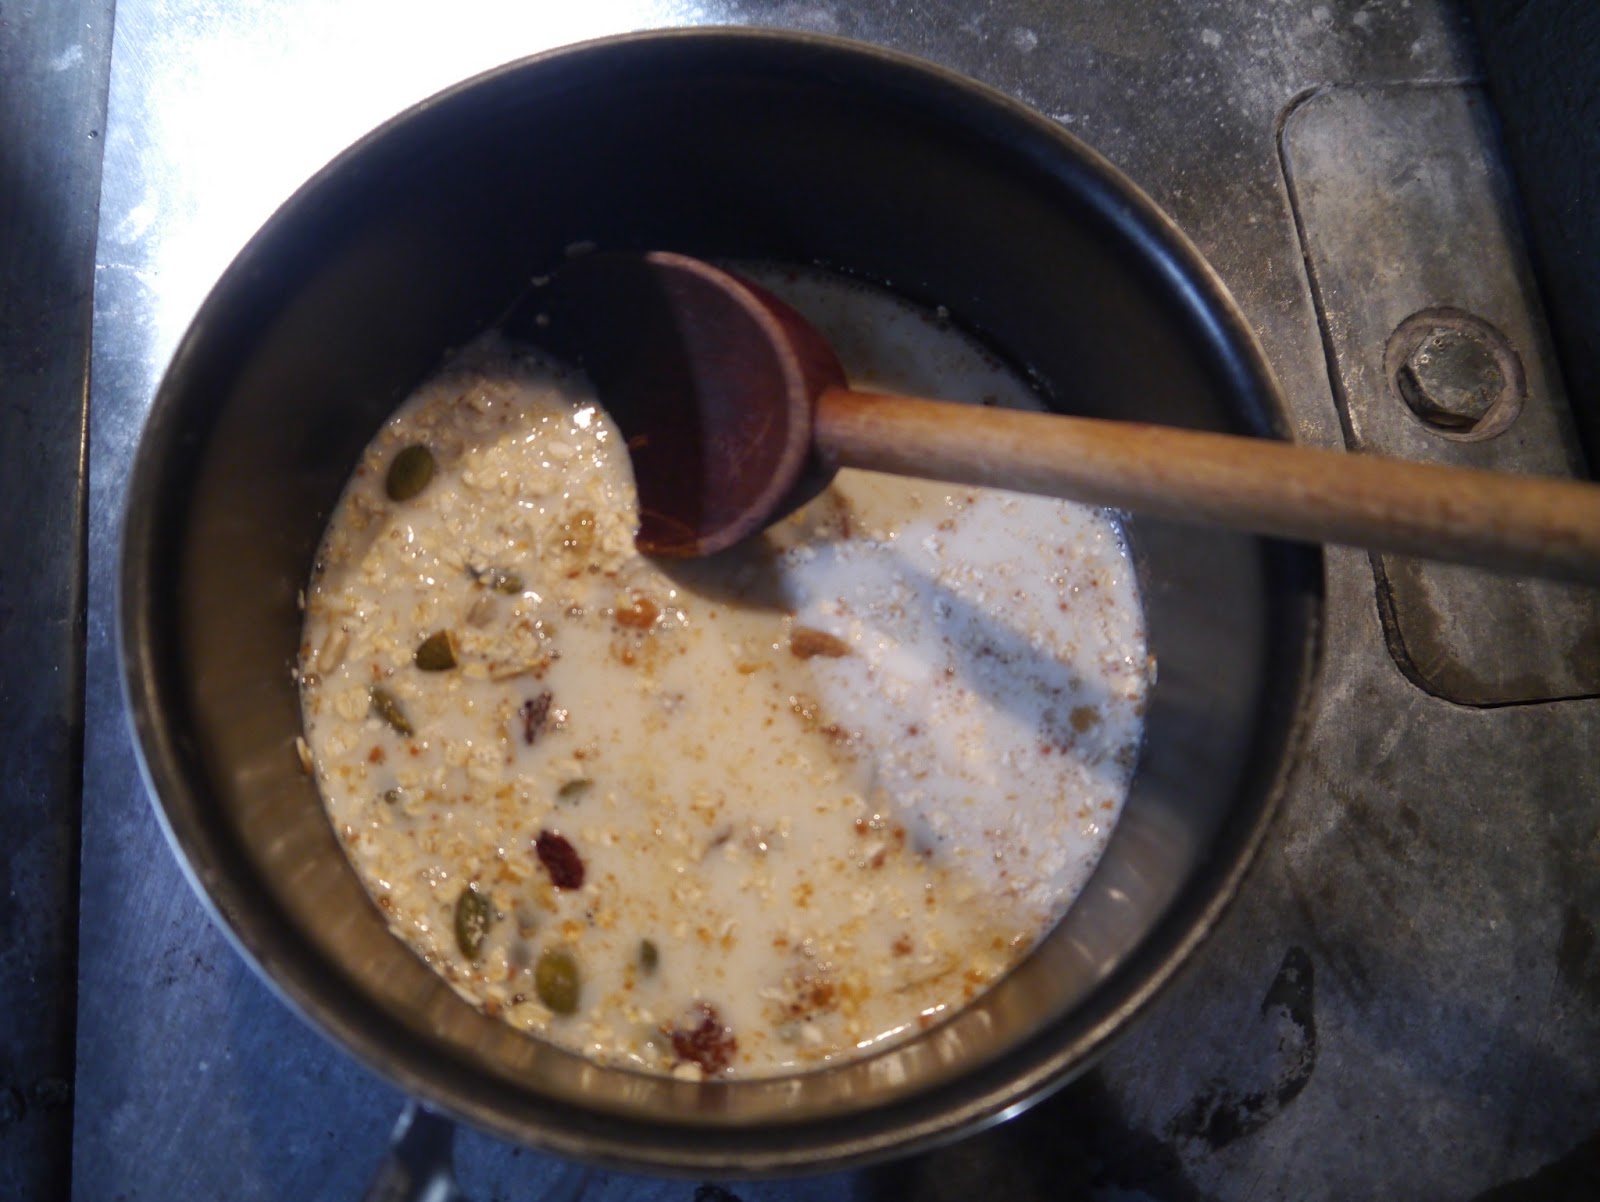
  1. Put everything in a pan and put on the heat. 
  2. Once simmering (little bubbles) stir constantly.
  3. When the porridge is the thickness you want, take off the heat. Put in bowl. Enjoy!
Uni Yums ♥

Thursday, 6 June 2013

Breakfast Pizza!

So we all know left over pizza from the night before tastes great! So I decided to mess around a bit and came up with this idea!

So for the pizza base, you can buy a ready made one, or a mix packet, or make your own, click HERE to see my post on making your own pizza dough :)

Serves: 1 person
Cooking time: 10 minutes
Cooking temp: 200 degrees C/ Fan 180 degree C/ Gas 7
Keeps for: 3 days in the fridge.
Average cost: 

Ingredients:
  • 2/3 pieces of bacon
  • 2/3 eggs 
  • 2 tablespoons of milk 
  • Cheese!
  • Tomatoes
  • Pizza dough
  • Oil
  • Margarine/butter
  • anything else you want to put on it!!

What you need:
  • Baking tray 
  • Topping board
  • Frying pan
  • Sauces pan
  • Bowl
  • Fork
  • Wooden/plastic cooking spoon
  • Cheese grater

How to make it:
  1. So put your pizza base/dough on the baking tray.
  2. Time to fry the bacon! So put the pan on the hob, add a bit of oil, and put the bacon in the pan. Leave to cook and turn every so often.
  3. Scrambled eggs! So crack the eggs into a bowl and add the milk. Beat with a fork.
  4. Put your pan on the hob and add a little bit of butter or margarine. Pour the eggs into the pan.
  5. The eggs will start to cook on the bottom as they do stir them with a soon so the rest can cook.
    Its hard to see in this photo, but at the top of the pan the egg is cooked, and the bit that isn't cooked had fallen to the bottom of the pan as I tilted it.

    nearly all cooked!

  6. Once the eggs are cooked, spread them onto the pizza base. 
  7. Once the bacon has cooked, cut it up and place onto the scrambled eggs on the pizza base.
  8. Cut up some tomato and put that on as well.
  9. Add top with some grated cheese.
  10. Put in the oven for 10 minutes, keep an eye on it, as it may take less than that!
  11. ENJOY!


    VEGGIES! okay so to make this suitable for vegetarians, of course don't use the bacon! You can add loads of other vegetables, such as, peppers and mushrooms, just mix it up, and add what you like!

    Uni Yums ♥

Pizza Dough!

So we all have to love pizza!!! I sure do! And here's a simple easy recipe for one.

Serves: 1 person
Cooking time: 10 minutes
Cooking temp: 200 degrees C/ Fan 180 degree C/ Gas 7
Keeps for: 
Average cost: 

Ingredients: 
  • 1 and a 1/2 cups of plain flour. (just use gluten free flour if you need to!)
  • 1 teaspoon of salt.
  • Just less than 1 teaspoon of dry active yeast.
  • 1/2 a cup of lukewarm water (you may need a bit more then this!)
  • 1 tablespoon of olive oil.


What you need:
  • Mixing bowl
  • Jug
  • Cup measurers
  • Teaspoon
  • Tablespoon
  • Cling film 

How to make it:
  1. Put all dry ingredients into a bowl and mix together. 
  2. Measure out oil and water and place into the jug.
  3. Add a small amount of water at a time, (DO NOT PUT ALL THE LIQUID IN AT ONCE!) mixing together with your hand.
  4. As you add more water the flour should start to come together into a ball of dough. 
  5. Flour the work top surface, and place dough on it and kneed for about 2 minutes or until its smooth.
    see all smooth now
  6. Now spread a bit of oil all over the bowl and place the dough in the bowl and cover in a small amount of oil.
  7. Put cling film over the bowl and leave the dough in the bowl to double in size for about an hour in the sun or in a warm room. (it actually only took about half an hour for mine to double, but it was sat in the very warm sunshine)
  8. Once the dough has doubled take it out of the bowl and kneed again a few times, and then roll out into pizza shape. (or you can do what my brother did, throw it in the air, like a proper pizza person)
    he then dropped it on the floor shortly after this was taken :L
  9. Oil a tray and place the pizza on.
  10. Add your desired toppings, don't forget to start with tomatoes on the bottom.
  11. Put in the oven for about 10 minutes or until golden brown and cheese is melted.
ENJOY!
Uni Yums ♥

Sunday, 2 June 2013

Croutons

Croutons, basically very toasted bread! and very yummy! Eat them with soup or salads to get a few carbs in without having a whole piece of bread.

Serves:  depends on how much bread you use!
Cooking time: 5-7 minutes
Cooking temp: 200 degrees C
Keeps for: in an air tight container 4 to 5 days, and can be frozen for up to 3 months.

Ingredients:
  • Bread 
  • Oil/oil spray
What you need:
  • Chopping board 
  • Knife
  • Baking tray
How you make it:
  1. Turn oven on up to 200 degrees C.
  2. Cut up your bread into small squares. (If you have followed the link from the breaded chicken then just cut up the left over crusts!)
  3. Spray/cover a baking tray in oil.
  4. Place bread squares on the tray.
  5. Cover/spray in oil.
  6. Put in oven.
  7. ENJOY!

    Uni Yums ♥

Omelet

Omelets are really easy to make, very filling and can be eaten at breakfast, lunch or tea!
Here I made a bacon, mushroom and asparagus (you may be thinking, that's expensive! yes, but if you can get it on offer or multibuy then its reasonable price) omelet, but you can put loads of different things in; peppers, cheese, broccoli, chicken, tofu...all sort, and they can easily be made suitable for veggies! :)


Serves: 1
Cooking time: 5-10 minutes
Cooking temp: high to medium
Keeps for:  if you have left overs it will keep in the fridge for 3 days
Average cost: £1.48 for needed eggs, bacon, mushrooms and asparagus.

Ingredients: 
  • 2 eggs 
  • 1/2 pieces of bacon
  • 6 small mushrooms
  • 4 pieces of asparagus
  • Water

What you need:
  • Frying pan
  • Bowl or jug
  • Chopping board
  • Cutting knife
  • Cooking spachelor
  • Pan
  • Fork

How to do it:
  1. Crack the eggs into a small bowl or jug, a whisk together with a fork until its all one colour. Add about a table spoon of water and stir in.
  2. Boil the kettle or heat up water until simmering in the small pan on the hob. Cut up asparagus into about 2cm pieces and place in pan on the hob. Leave to cook for about 5-10 minutes.
  3. Meanwhile put frying pan on the hob on medium to high heat. Add a small amount of oil to the frying pan. place the bacon in the frying pan and leave to cook. (will need turning over)
  4. Start chopping up the mushrooms and put into the frying pan with the bacon to cook.
  5. Once the bacon and mushrooms are cooked take the frying pan off the heat. 
  6. Take the bacon out of the pan and cut up into small piece. And put back into the frying pan with the mushrooms.
  7. Take the asparagus off the heat, and drain the water out of the pan. Put the asparagus into the frying pan with the bacon and mushrooms.
  8. Place the frying pan back on the hob with high/medium heat.
  9. Pour the egg mixture into the frying pan.
  10. Once the mixture in the pan starts to cook the bottom will be firmer than the rest. With the spachelor pull away part of the side of the omelet to allow more of the wet mixture to cook on the pan.
    see the lighter yellow bit, that's cooked and is what you need to pull away from the pan to allow the darker yellow wet stuff to cook.
    if you will the pan this will allow the wet mixture to flow onto the bar pan area and cook
  11. Do this round all of the edge of the omelet. And again once that has cooked until there is no wet mixture left in the pan.
    COOKED!
    Enjoy! 


    Uni Yums ♥
    Average cost estimated from www.asda.com other super markets may be cheaper so shop around!

Saturday, 1 June 2013

Stewed Rhubarb/ Rhubarb Yoghurt!

So I previously posted that I had a lot of rhubarb and had no idea what to do with it!

Here is an easy peasy recipe. It goes well with yoghurt, ice cream, other fruit and meringue. And it's a great way to get some sugar into your diet along with some yummy fruit!

Stewed Rhubarb

Serves: 2/3.
Cooking time: about 5 to 10 minutes.
Keeps for: 3 days in the fridge and can be frozen for 3 months.
Average cost: 65p for 3 sticks of rhubarb. 15p for 50 grams of sugar 80p for total recipe. (1 bag of sugar is £1.48)

Ingredients:
  • 3 sticks of Rhubarb
  • 1 hand full of Caster sugar or plan sugar (honestly doesn't matter)
  • Table spoon of water
What you need:
  • Pan
  • Cooking spoon
  • Table spoon
How to make it:
  1. Turn the hob onto high.
  2. Cut off the ends of the rhubarb stalks.
  3. Chop into pieces about 2 cm long. 
  4. Put 1 table spoon of water into the pan. (DO NOT PUT ANY MORE IN! trust me, I know it seem such as small amount but rhubarb contains a lot of juices.)
  5. Put the rhubarb into the pan and put on the hob.
  6. Add 1 hand full of sugar into the pan and stir into the rhubarb. Lower heat so the rhubarb is simmering. (small bubbles)  
  7. Stay by the oven and keep stirring the rhubarb every so often.
  8. Its now up to you how long you cook this for. There isn't a set time needed for it to be cooked. If you want it to be like a purée then keep cooking it until it looks like one.  If you want chunks in it then you don't need to cook it for as long. 
    chunkier stewed rhubarb 

    how I like it slightly purée slightly chunky
  9. Once cooked, turn the hob off, and put the pan on the side. You will need to taste it and add more sugar if it is too sour still. Just stir in the extra sugar. 
  10. Put into a bowl and add to yoghurt to make your own rhubarb yoghurt, or it's tastey with ice cream :) (If you are vegan obviously you know not to eat with ice cream/yoghurt.)
  11. For storing, wait until cool and then put in a tub, label it, and then place in the fridge and eat within 3 days, or in the freezer and eat with in 3 months. 
Uni Yums ♥

Average cost estimated from www.asda.com other super markets may be cheaper so shop around!